There’s nothing quite like the feeling of setting out on open water in a vessel you’ve built with your own hands. For many, building a boat is more than just a hobby—it’s a labor of love, a way to connect with craftsmanship, and the ultimate personal challenge. Whether you’re an experienced woodworker or a first-time builder, a DIY boat project is both rewarding and exciting. But to truly be “ready for the water,” your boat needs more than just a solid hull. It needs careful planning, precise execution, and a little bit of heart.

Getting Started: Planning and Design
Every successful DIY boat project starts with a plan. Before you pick up a single tool, it’s essential to define your goals. Are you building a small rowboat for weekend lake trips? A fishing skiff for quiet mornings on the river? Or maybe even a sailboat for coastal cruising? Your choice will determine the design, size, materials, and complexity of the project.
Once your purpose is clear, you’ll need a set of reliable boat plans. There are many free and paid options available online, catering to all skill levels. Choose a design that fits your experience, time commitment, and budget. If you’re new to boatbuilding, a simple plywood stitch-and-glue dinghy might be the perfect starting point. More ambitious builders might opt for a strip-planked canoe or a plywood runabout.
Materials Matter
The materials you choose will impact not only your boat’s performance but also how long it lasts and how much maintenance it will require. Plywood is a popular choice for many DIY builds due to its strength-to-weight ratio and ease of use. Marine-grade plywood, though more expensive, resists moisture and delamination much better than regular construction-grade boards.
Other common materials include fiberglass (used to sheath wooden hulls for waterproofing and durability), epoxy resin (for bonding and coating), and hardwoods like oak, mahogany, and cedar (often used for framing or detailing). Keep in mind that marine hardware—like stainless steel fasteners and fittings—are crucial for long-term durability in wet environments.
Tools of the Trade
You don’t need a full-fledged boatyard to build a seaworthy vessel, but having the right tools is critical. A basic boatbuilding toolkit might include:
- Circular saw or jigsaw
- Power drill and bits
- Clamps (you’ll never have enough)
- Planes, chisels, and sanding blocks
- Measuring tape, straight edge, and square
- Safety gear (gloves, goggles, dust mask)
Epoxy work requires careful mixing and patience, so disposable mixing containers, brushes, and syringes can also come in handy. It’s also smart to set up a well-ventilated, dry workspace with room to maneuver your materials and boat as it takes shape.
Building the Hull
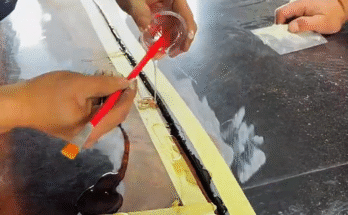
Most DIY boats begin with the hull—the shell of your boat that will meet the water. Depending on the type of boat and construction method, this might involve cutting plywood panels, assembling a frame, or even laying down strips of cedar in a mold. One popular method is stitch-and-glue construction, where panels are temporarily “stitched” together with wire or zip ties and then glued and glassed with epoxy and fiberglass tape.
Accuracy and patience are your best friends here. Measure twice, cut once. Dry fit everything before gluing. Sand edges smooth, and always allow epoxy and coatings to cure properly before moving on. The hull is your boat’s foundation, so take your time to get it right.
Sealing and Painting
Once the hull is assembled, it needs to be waterproofed. This typically involves applying a coat (or several) of epoxy resin, often followed by a layer of fiberglass cloth. This process not only seals the wood but adds structural strength. After the resin cures, the hull is sanded smooth and then painted with marine-grade paint or varnish to protect against UV rays, salt, and weathering.
Choosing the right paint scheme isn’t just about looks—light colors reflect sunlight and help keep the interior cooler. Anti-fouling paint on the bottom can prevent marine growth if you plan to leave the boat in the water for extended periods.
Outfitting and Final Touches
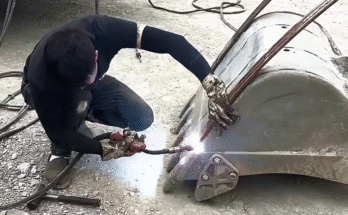
Now it’s time to bring your boat to life with hardware and finishing touches. Seats, thwarts, and flooring can be installed once the hull is finished. Stainless steel cleats, oarlocks, grab handles, and other fittings should be securely fastened and sealed. If your boat will be powered, now’s the time to mount an outboard motor bracket and install fuel lines or electrical systems.
Don’t forget essential safety gear: life jackets, an anchor, a bailer or pump, and running lights if you’ll be out after dark. A little forethought now can go a long way toward ensuring safe and enjoyable adventures later.
The Maiden Voyage
Launching your DIY boat for the first time is a thrilling milestone. Before hitting the open water, start with a calm, shallow location and have a friend nearby for assistance. Check for leaks, trim balance, and maneuverability. Make small adjustments as needed. Don’t forget to bring paddles, even if your boat has a motor—redundancy is always smart on the water.
The first voyage is about testing and learning. With every trip, you’ll build more confidence in your craftsmanship and your boat’s abilities.
Lessons Learned
No DIY boat project goes perfectly. You’ll make mistakes. You’ll get epoxy in your hair. You’ll probably redo a few parts. But that’s all part of the journey. With each challenge, you’ll gain skills, knowledge, and appreciation for the process. In the end, you’re not just building a boat—you’re building experience, confidence, and maybe even a legacy.
Some builders go on to make a second or third boat, constantly refining their techniques and exploring new styles. Others stick with their first vessel for years, maintaining and modifying it as their needs evolve. Whatever your path, your DIY boat becomes more than just a project—it becomes a story.
Ready for the Water
As your boat glides into the water, bobbing gently in the current, you’ll know: every late night, every sanding session, every epoxy-smudged afternoon was worth it. You built this. It floats. It works. And it’s yours.
With some careful upkeep and a spirit of adventure, your DIY boat will take you places—both literal and personal—you never expected. So grab your paddle or fire up the motor. The water is waiting.