Cutting a clean, precise groove across a wood plate is a fundamental woodworking skill used for joinery, decoration, and creating sliding elements. This process, often called “grooving” or “dadoing,” requires careful measurement and the right tools to achieve a professional result. This guide outlines the steps to make perfect transverse grooves.
Part 1: Planning and Preparation
Precision starts with proper planning and a safe workspace.
- Measure and Mark: Use a square and a pencil to mark the exact location and width of your groove. A marking knife can be used to score the lines, which helps prevent tear-out.
- Safety First: Always wear eye protection and hearing protection. Ensure your workpiece is clean and free of knots or foreign objects that could damage your tools.
- Choose Your Tool:
- Router: Excellent for precise grooves of various widths and depths. You will need a straight bit of the correct diameter.
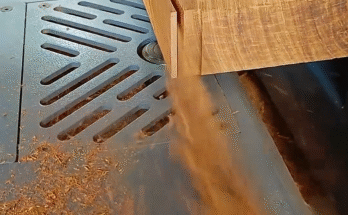
- Table Saw with a Dado Stack: The fastest method for making a wide, flat-bottomed groove in a single pass.
- Circular Saw with a Guide: A good option for making grooves when you don’t have a table saw or router table, but it requires a straight edge guide.
Part 2: Setting Up the Cut
Proper tool setup is crucial for accuracy and safety.
- Set the Depth: Adjust the cutting depth of your tool to match the desired depth of the groove. Typically, a groove’s depth is about one-third to one-half the thickness of the wood.
- Install a Fence or Guide: Use a fence on a table saw or a straight-edge guide on a router or circular saw. This guide must be clamped securely to the workpiece to ensure the cut is perfectly straight and in the correct location.
- Secure the Workpiece: Use clamps to hold the wood plate firmly to your workbench or saw table. Never hold the workpiece with your hands alone, as this is a major safety risk and can lead to an inaccurate cut.
Part 3: Making the Cut
Executing the cut requires a slow, steady hand.
- Start the Tool: Turn on your tool and allow it to reach its full speed before making contact with the wood.
- Make the Cut: Guide the tool along the fence or guide, moving slowly and consistently across the wood plate. Do not rush the process, as this can cause the blade or bit to bind and result in a rough cut.
- Adjust and Recut (If Needed): If you are using a tool that cannot make the full-width groove in a single pass, make multiple passes, adjusting the fence or guide slightly each time to widen the groove until it reaches your desired dimension.
Part 4: Finishing the Groove
The final steps ensure a clean, ready-to-use groove.
- Clean the Groove: After the cut is complete, use a chisel or a small, flat file to clean up any slight imperfections in the corners or on the bottom of the groove.
- Sand the Groove: Use a sanding block with fine-grit sandpaper (around 180-220 grit) to smooth the walls and bottom of the groove. This removes any tool marks and creates a polished finish.
- Final Inspection: Double-check the width, depth, and squareness of your groove to ensure it meets your project’s specifications.