Woodworking is one of the oldest crafts known to humanity, and within it, the art of wood carving and molding holds a special place. Carving and molding not only allow artisans to express creativity, but they also serve functional purposes in architecture, furniture, and decorative objects. One key aspect of this process is cutting—precise shaping and removing material to create intricate patterns and forms. This article explores the detailed process of wood carving molding cutting, from the tools and materials involved to techniques, safety considerations, and modern innovations.
Understanding Wood Carving and Molding
Wood carving involves shaping wood by removing parts of it using cutting tools to create decorative or functional forms. Molding, in contrast, typically refers to a strip of wood with a profile cut into it for decorative trim or functional applications such as framing, paneling, and crown moldings. While molding can be mass-produced with machines, custom molding often involves carving techniques.
The cutting process is central to both. It includes the selection of wood, layout of the design, removal of wood using various tools, refining details, and finishing.
1. Selecting the Right Wood
The first step in the carving and molding cutting process is selecting the appropriate wood. The choice of wood greatly influences the ease of carving, the final look, and durability.
Common types of wood used include:
- Basswood – Soft, with fine grain, easy to carve.
- Butternut – Similar to basswood, lightweight and pale in color.
- Oak – Hard and durable, suitable for bold, strong carvings.
- Maple – Dense and smooth, good for detailed work.
- Mahogany – Rich color, relatively easy to carve despite its hardness.
Softwoods are typically used for beginners or for detailed carving, while hardwoods are used when strength and longevity are required.
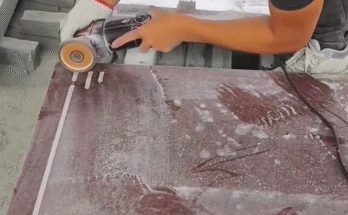
2. Tools of the Trade
The tools used in the wood carving molding cutting process vary depending on whether the work is hand-crafted or machine-assisted.
Hand tools include:
- Chisels and gouges – Different sizes and shapes are used for various details.
- Carving knives – Ideal for whittling and fine shaping.
- Mallets – Used to drive chisels through harder woods.
- Rasps and files – For smoothing and shaping edges.
Machine tools include:
- Routers – For cutting moldings and patterns.
- Table saws and miter saws – For straight and angled cuts.
- Band saws and scroll saws – For curved or intricate cuts.
- CNC routers – Computer-controlled cutting for precision and mass production.
Modern workshops often combine hand tools with machines to increase efficiency while preserving the craftsmanship of hand carving.
3. Design and Layout
Before any cutting begins, it’s crucial to create a layout or template of the desired pattern. This can be done by sketching directly on the wood or using printed stencils.
Design considerations include:
- Scale – The size must fit the final application, whether it’s a door frame or a decorative panel.
- Symmetry and balance – Especially important in architectural moldings.
- Depth – How deep the carving will go affects both visual impact and structural integrity.
Templates help ensure consistency, especially in repetitive molding patterns.
4. Rough Cutting and Shaping
The cutting process typically starts with rough cuts to remove large sections of excess wood. This step lays the groundwork for more refined shaping.
Steps include:
- Marking the design with pencil or carbon paper.
- Making primary cuts along the outline using a band saw, scroll saw, or coping saw.
- Removing bulk wood with chisels or gouges, following the grain to avoid splintering.
Rough cutting requires careful planning. The wood grain’s direction must be respected, as cutting against it can lead to cracks or breakage.
5. Detailing and Refining
Once the basic form is established, the focus shifts to refining details. This involves more precise and delicate cuts.
Techniques include:
- Undercutting – Creating depth and shadow by cutting behind edges.
- Texturing – Adding surface texture for realism (e.g., fur, feathers, bark).
- Smoothing – Using fine rasps, sandpaper, or small carving tools to eliminate tool marks.
Patience and attention to detail are essential at this stage. Mistakes in this phase can be hard to correct without starting over.
6. Molding Profiles
In molding work, specific profiles (shapes) are cut into wood strips. These profiles can be classical, such as ogee, cove, or bead-and-reel, or customized.
Creating molding profiles involves:
- Shaping with router bits – Using a router table and appropriate bit for the desired shape.
- Repeating uniform cuts – Ensuring consistent profile depth and angle.
- Finishing edges – Using sandpaper or files to soften and refine edges.
Carved moldings may also include floral, geometric, or scroll patterns, requiring both machine and hand-carving methods.
7. Sanding and Surface Preparation
After cutting and carving, the wood must be smoothed to prepare it for finishing.
Steps include:
- Progressive sanding – Starting with coarse and moving to fine grits (80 to 220 or higher).
- Inspecting for flaws – Using a bright light to find scratches or missed tool marks.
- Dust removal – Using brushes or compressed air to clean the surface.
Sanding enhances the wood’s appearance and ensures even absorption of stains or finishes.
8. Finishing the Carving
The final stage involves applying a protective or decorative finish to the wood.
Common finishes:
- Stain – Enhances natural grain and color.
- Paint – Used for vibrant, artistic effects or matching décor.
- Oil – Brings out grain and adds a soft sheen.
- Varnish or polyurethane – Protects from moisture and wear.
In artistic carving, finishes may also include gilding (applying gold leaf) or burning (pyrography) for added detail.
9. Safety Considerations
The wood carving molding cutting process requires strict attention to safety.
Safety tips:
- Always wear eye protection and a dust mask.
- Use clamps to stabilize workpieces.
- Keep tools sharp to reduce the need for force.
- Avoid loose clothing and tie back long hair near machines.
- Work in a well-ventilated area, especially when applying finishes.
Proper safety gear and good habits can prevent injuries and extend the life of tools.
Conclusion
Wood carving and molding cutting is a blend of art, engineering, and craftsmanship. From selecting the right wood to executing precise cuts and applying the perfect finish, every step requires skill and patience. Whether creating detailed decorative panels or practical architectural moldings, understanding the complete cutting process ensures that each piece is both beautiful and enduring. With the right tools, techniques, and care, woodworkers can transform raw timber into timeless works of art.