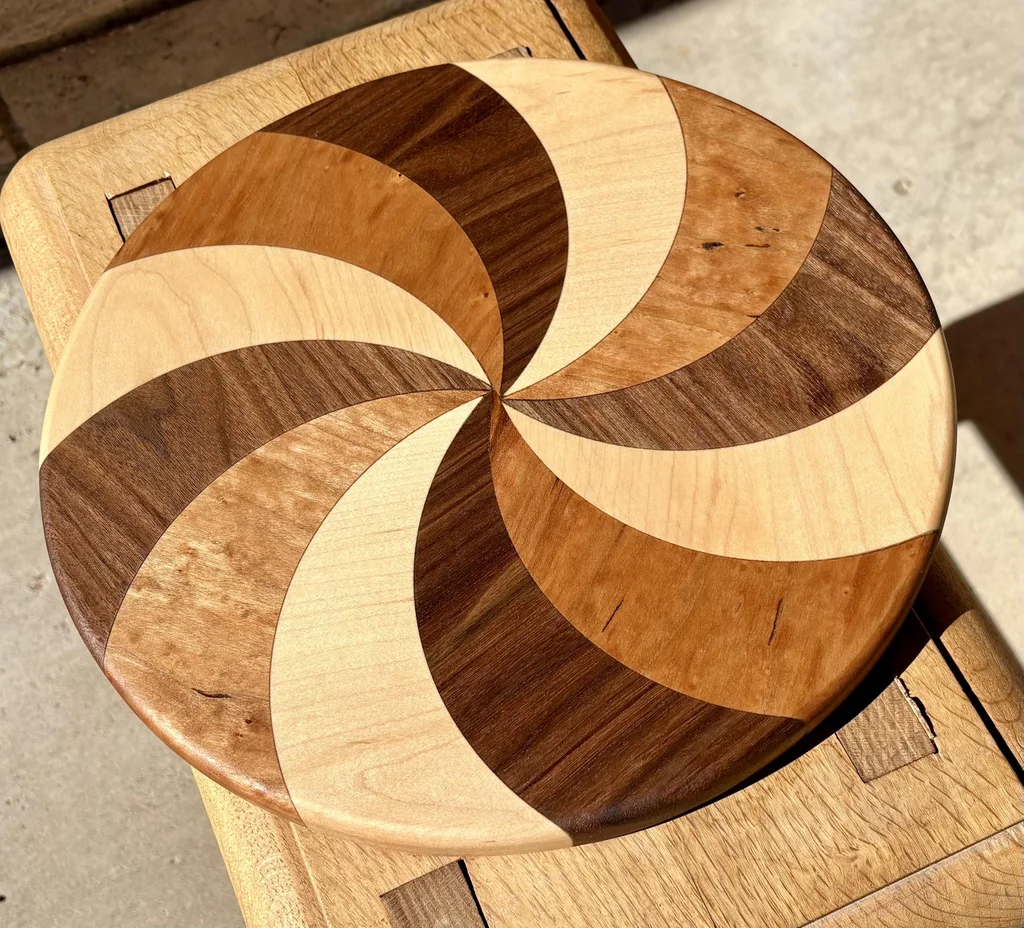
This project involves creating a charcuterie board from twelve curved wooden segments that, when assembled, form a pinwheel shape.
Step 1: Build a Jig Start by building a jig, a tool made of 1/2-inch plywood with a 3/8-inch dowel pin for a pivot. This jig is crucial for cutting the precise curved sections needed for the board.
Step 2: Prepare Wood Segments Gather twelve pieces of hardwood, such as walnut, cherry, or hickory, each measuring 3.5 inches by 6.5 inches by 3/4 inch thick.
Step 3: Cut the Segments Using the jig and a bandsaw, cut the curved arcs into the wood pieces. It’s critical to ensure the distance from the pivot axle to the bandsaw blade is accurate. The first segment is cut at an elevated position, and then the remaining segments are cut in a specific sequence to create the interlocking curves.
Step 4: Glue and Clamp Glue the curved pieces together. This step can be challenging, so it’s recommended to glue a few segments at a time and use a band clamp and cauls to keep the assembly flat and prevent the pieces from slipping.
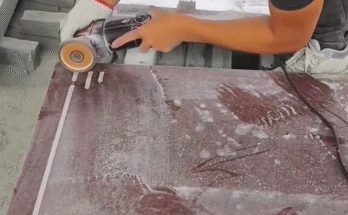
Step 5: Trim, Sand, and Finish Once the glue has dried, use a compass to draw a circle on the board and cut it to the desired circular shape with a bandsaw. Finish the edges by sanding and rounding them over with a router. Apply a food-safe oil to complete the board.
You can find the full, step-by-step instructions with pictures and a video on the original Instructables page, which also includes a drawing of the jig and a list of necessary supplies.